Bunker Talk blog with 30,000 photos of my toy soldier collection of Roco Minitanks, Heiser Models, Fidelis Models, Airfix and Pegasus figures; and 54mm & 60mm plastic soldiers from Tim Mee, Elastowit, BMC, MPC. Be sure to follow Bunker Talk. Email at BunkerMeister45@aol.com. Get merch at: https://www.redbubble.com/people/bunkertalkwar/shop
Followers
Thursday, May 31, 2012
Resin Bits
My friend, and master modeller, Richard, wanted some bits for a space ship he was working on.
The first one did not work out, but the other rocket nozzles turned out okay.
I made four of them for him.
He also needed these other parts.
It was an open face mold but it had a severe undercut at the top, which made it hard to get out of the mold. Check out http://www.smooth-on.com/ for more information on resin casting. It's very helpful to make copies of your own master model or to cast up a broken or lost part to fix a model.
Wednesday, May 30, 2012
Boob Job
This is a stack of wire, coated in Btuy. plastic.
It is Plastruct 1.2mm wire coated in plastic. I used the part with the black ink on it as the length guage so they are all cut the same length.
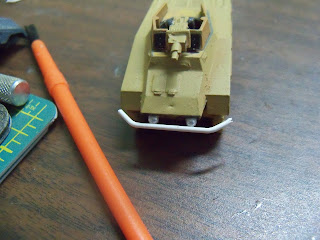
Then using a pair of pliers they are bent into bumper shape.
These are 2.5mm size plastic beads.
Glued onto the front of the 234 series armored car they look like headlights or a boob job.
They are neither, they are bumper supports. I use the Plastruct glue to hold them all in place.
Tuesday, May 29, 2012
Panzer IV Gun
The new lower needs work on the axle; it has to be shortened.
All better and the flash has been trimmed off the wheels too.
The old hull lower will donate it's wheels to the spare tire bin.
The turret used the 75mm short barrel cannon. They were the same guns used early war on the Panzer IV.
It's missing the plugs for the front of the face plate, the upper turret half has lots of flash. I got the replacement parts so this will be restored better than new.
Monday, May 28, 2012
Roco German Recon
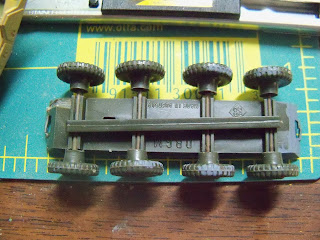
Another interesting SdKfz 234/1 problem. The axles have all been glued down so the wheels don't turn.
The glue was troweled on so it filled the space for the axles.
I guess the previous owner did not have the retaining bar to hold them in.
From the junk pile comes a new lower hull, axles, wheels and retaining bar.
Got to tidy up that third axle, too long.
Sunday, May 27, 2012
Armored Car Repair
A common problem with the Roco 234/1 armored car is the axle length is too long or too short.
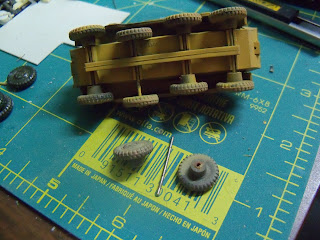
That problem is enhanced when the wrong tires are used on the vehicle. The second axle has Opel Blitz truck tires.
I had extra tires, so the truck tires will be removed. See the big knob on the inside of the armored car tires? It is a spacer to keep them in the right place.
All better with new tires.
They even almost match the paint scheme.
Saturday, May 26, 2012
Second World War, German Armored Cars
Roco 234 armored cars often have bad flash on the tires. It's gotta go.
Another common problem is the sink hole on the upper glacis and the broken clips tohold the hulls together.
Customization is easy, I glue the hulls and cut off the protrusions where the hull parts clip together. Add a bundle, box or bag and you give a more personalized version.
Here I have trimmed up the rear fender problem and added a spare tire.
I had more of these than I needed and many were in very bad condition. So I have removed the wheels and cut them down to make the spare tires. One armored car provides spares for eight of it's brothers. I am no putting a spare tire on every one, but most of them.
Friday, May 25, 2012
WWII German Armored Cars
The regular 234/1 and the ARV version.
I wanted to increase the ARV look, so I added a tow cable and hook, and a couple gas cans to the fenders.
I also put a Roco block and tackle on the back for the crane.
The armored car collection was in poor shape, this one had a broken rear connection to the upper and lower body. There is also flash on the tires and lower body to remove.
The damage to the rear fender is a common mold flaw for these models. It is where the upper hull attached to the sprue and it looks like it was torn off rather than cut off.
Thursday, May 24, 2012
234 ARV
With extreme vehicle shortages, the Germans in WWII used just about everything they could get.
They also attempted to retrieve anything that went bad on them.
So on this surplus SdKfz 234/1 armored car I added a wooden roof over the turret hole.
Then I glued on a winch and made an armored recovery version.
Seen here with a Roco 234/1 in the more usual configuration, plus spare tire. I have no evidence the Germans actually made one of these, but certainly at the unit level it would have been possible, useful and they did this with many of their used up tanks. So I think it is unlikely, but possible.
Wednesday, May 23, 2012
234/5 Armored Car Puma II?
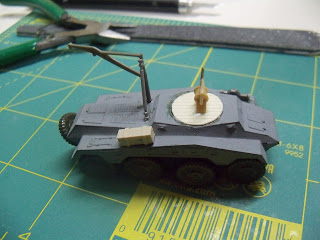
I used the lower half of the Roco 20mm gun turret for the Luchs turret. It fit almost perfectly. It was a junk turret that was damaged by the previous owner to applied way too much glue. I used a tiny amount of Goo rubber glue to hold the resin turret to the styrene plastic lower hull bit.
Then I stuck the lower turret on the 234/1 hull and perfect fit.
I only know of one photo of this vehicle and can't find any indication that it actually turned but I figure it probably did. The real Luchs turret was small and probably fit in the hole for the original turret.
I have added a scratch built hatch too. Also a storage box on the fender, gas can on the back, and spare tire too.
I have no evidence for this vehicle, I just made it up. Since I have a zillon of these things, okay 84 SdKfz 234/1 and /3 and there are only 25 in a division, I figure I have a few extras. Some are in terrible shape. This one became the ARV version. It certainly does not seem unreasonable that a recon company may have converted one of their armored cars into a recon version if the turret were destroyed. It keeps the vehicle in service providing a valuable service. I added a winch, and crane, jack and spare tools and spare tire. I am only building one.
Tuesday, May 22, 2012
234/5 Armored Car
While surfing the Web I found a 234 armored car with a Linx tank turret.
http://militarymodels.co.nz/2010/10/22/sd-kfz-234-or-maybe-an-sd-kfz-232-of-some-kind/
So I ordered one turret from WSW in HO 1/87 scale.
I have been cleaning up and upgrading my SdKfz 234 collection off and on for a while now.
As the photos attest, it's a laugh riot.
Most of them have to be taken apart to cut off the flash, and clean them up so they can be put back together.
Subscribe to:
Comments (Atom)


