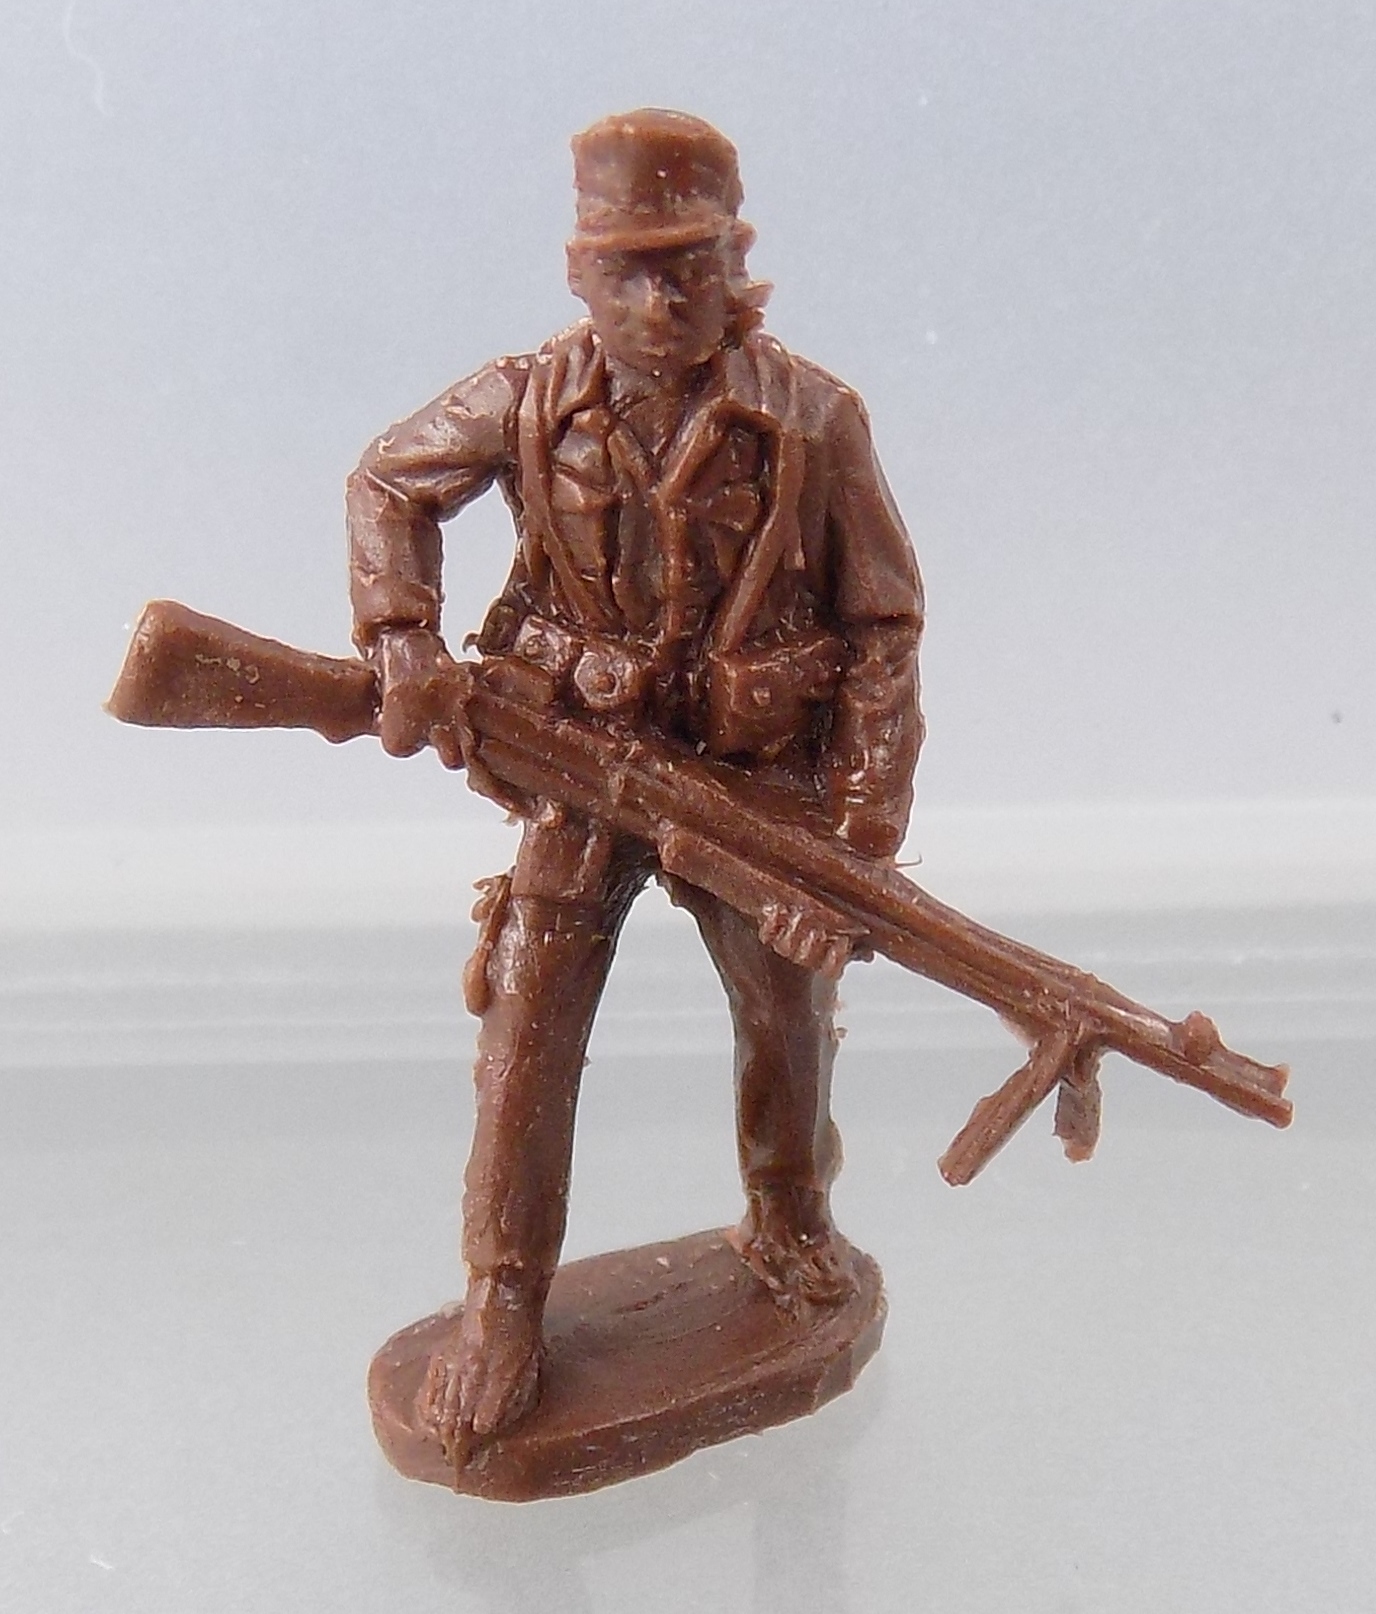
Orion 1/72nd scale plastic Ruff Puffs. BAR gunner with the big gun.
This set has a great mix of weapons but most of them are too big. This Grease Gun is oversized but looks pretty good anyway.
This M1 rifle is good but the muzzle end is wonky.
This M1 looks better and the figure is in a good pose, at the ready.
Cut the barrel down a little on the carbine and this guy would be okay I think. Nice advancing pose.
Not quite ready to fire, no cheek weld to the stock, still trying to decide if to shoot or not I think. Another long barrel carbine.
A little work on trimming the carbine barrels and you have a plausible group.
Bunker Talk blog with 30,000 photos of my toy soldier collection of Roco Minitanks, Heiser Models, Fidelis Models, Airfix and Pegasus figures; and 54mm & 60mm plastic soldiers from Tim Mee, Elastowit, BMC, MPC. Be sure to follow Bunker Talk. Email at BunkerMeister45@aol.com. Get merch at: https://www.redbubble.com/people/bunkertalkwar/shop
Followers
Monday, November 21, 2022
Sunday, November 20, 2022
Ruff Puffs II
1/72nd scale Ruff Puffs in close up.
These are a really great set of figures. Not only would they work well for Ruff Puffs, but some of them would work for ARVN, and even US Army for Vietnam as other combat from abut 1955 to about 1975 or so.
These figures might even work for African or Asian mercenaries.
I think the proper paint job would permit them to be used in many places. The only real flaw with these figures is the carbine barrels are too long. I think if I trim off a few millimeters of the gun barrels they will look a lot better.
Good pose for the machine gunner, but the barrel seems to be the super extra heavy version!
Prone guy with very long barrel carbine.
Nice pose with an unusual weapon.
These are a really great set of figures. Not only would they work well for Ruff Puffs, but some of them would work for ARVN, and even US Army for Vietnam as other combat from abut 1955 to about 1975 or so.
These figures might even work for African or Asian mercenaries.
I think the proper paint job would permit them to be used in many places. The only real flaw with these figures is the carbine barrels are too long. I think if I trim off a few millimeters of the gun barrels they will look a lot better.
Good pose for the machine gunner, but the barrel seems to be the super extra heavy version!
Prone guy with very long barrel carbine.
Nice pose with an unusual weapon.
Saturday, November 19, 2022
Limber Done
Take a sanding stick and sand down the top of the brick. Trim the plastic sheet around the edges of the brick so that it's even all the way around.
Glue another piece of sheet plastic on the top of the brick. The Evergreen Scale Plastic comes in thinner sheets of plastic that are less expensive than the .040 sheets. They will also work and would same some money if a lot of them were being built. I use Plastruct Plastic Weld General Purpose Plastic Solvent Cement. It works well with Lego and fake bricks. Legos and similar bricks don't always glue well without specialized adhesives.
Cut a piece of Evergreen Scale Models item number 297 Angle 1/4" size that is the same length as the brick.
Line up the edge of the angle with the top of the limber and glue it onto the front of the limber.
Put the wire into the groove at the bottom of the limber. The wheels are from Eagle Games American Civil War artillery. They are large, cheap, and durable.
Drill a hole in the front bottom center of the limber the same diameter as the plastic coated wire. Insert a length of rod into the hole and glue it with the Plastruct glue.
Drill a second hole in the rear center bottom of the limber. Insert an eye pin into the hole and glue it into place. Put a dab of superglue on the eye pin, and a dab of Plastruct glue in the hole. Make the loop at the end of the eye pin vertical. Using your wire cutters, clip a bit of the eye so that creates a trailer hitch for the cannon. Eye pins are sold in the jewelry department of stores like Hobby Lobby and are little wires with a loop at one end. This makes a very good limber, not too expensive and not too hard to make. I have several other versions that I make and likely they will appear in another issue of Bunker Talk.
Glue another piece of sheet plastic on the top of the brick. The Evergreen Scale Plastic comes in thinner sheets of plastic that are less expensive than the .040 sheets. They will also work and would same some money if a lot of them were being built. I use Plastruct Plastic Weld General Purpose Plastic Solvent Cement. It works well with Lego and fake bricks. Legos and similar bricks don't always glue well without specialized adhesives.
Cut a piece of Evergreen Scale Models item number 297 Angle 1/4" size that is the same length as the brick.
Line up the edge of the angle with the top of the limber and glue it onto the front of the limber.
Put the wire into the groove at the bottom of the limber. The wheels are from Eagle Games American Civil War artillery. They are large, cheap, and durable.
Drill a hole in the front bottom center of the limber the same diameter as the plastic coated wire. Insert a length of rod into the hole and glue it with the Plastruct glue.
Drill a second hole in the rear center bottom of the limber. Insert an eye pin into the hole and glue it into place. Put a dab of superglue on the eye pin, and a dab of Plastruct glue in the hole. Make the loop at the end of the eye pin vertical. Using your wire cutters, clip a bit of the eye so that creates a trailer hitch for the cannon. Eye pins are sold in the jewelry department of stores like Hobby Lobby and are little wires with a loop at one end. This makes a very good limber, not too expensive and not too hard to make. I have several other versions that I make and likely they will appear in another issue of Bunker Talk.
Friday, November 18, 2022
Limber and Lego
I use a Plastruct 1.6mm Buty. Coated Wire number 90102 as the axle. These are hard to cut and I use a big pair of wire cutters. The metal is very tough so make sure you have a good cutter for it.
The groove in the brick should be deep enough that the wire will fit below the level of the edge of the brick.
I use a tiny rat tail file that is only slightly larger in diameter to the wire. Tools like this are found in model railroad shops.
Here is the file in the brick.
Since the file tapers it should file the brick from both sides.
Once the groove has been made glue a bit of sheet styrene to the bottom of the brick. I use Evergreen Scale Models .040 thick plain sheet plastic or thinner.
The groove in the brick should be deep enough that the wire will fit below the level of the edge of the brick.
I use a tiny rat tail file that is only slightly larger in diameter to the wire. Tools like this are found in model railroad shops.
Here is the file in the brick.
Since the file tapers it should file the brick from both sides.
Once the groove has been made glue a bit of sheet styrene to the bottom of the brick. I use Evergreen Scale Models .040 thick plain sheet plastic or thinner.
Subscribe to:
Posts (Atom)